|

| |
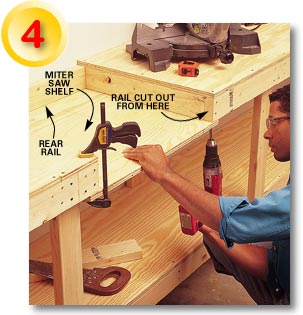
CUT out the 2x4 rail in the front of the open
miter saw bay with a handsaw. Fasten the 3/4-in. plywood miter
saw shelf to the underside of the 2x4s in the miter saw bay
with 3-in. screws at each side and into the rear rail. Screw a
2x4 support to the backside of the legs on either side of the
miter saw bay to support the shelf (
Fig.
A ).
|

|

|

| |
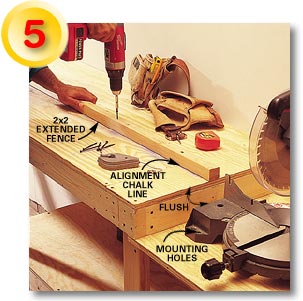
PLACE the miter saw in its permanent position
and measure the distance from the front of the fence to the
wall. Measure and mark that distance from the wall and snap a
chalk line on the left table to align the extended fence.
Screw an 8-ft. long 2x2 into every 2x4 crosspiece with 3-in.
screws, holding the right end even with the edge of the miter
saw bay.
|
|